#AndroidStudio ตอนที่ 9 Layout ของการแจ้งเตือน
และการสร้าง Layout at Runtime และเมนู กับการแสดงภาพต่อตาม Vertical
<introduction>
อารัมภบท
ความตั้งใจครั้งแรก คือ การวาง Layout ของการแจ้งเตือน โดยแสดง ImageView และ TextView คู่กัน เรียงเป็นบรรทัดลงไปแบบ Vertical แต่พอได้ลงไปวาง Layout พบว่า โปรแกรมแนะนำว่าให้ใช้ Drawable ตามที่เคยใช้ใน ตอนที่ 8 ข้อ 8 พอใช้ตามคำแนะนำ ก็พบปัญหา ความตั้งใจจึงเบี่ยงเบนไปเรื่องการทำ Valign=Top ว่าทำอย่างไรให้ภาพอยู่ในตำแหน่ง Top แล้วก็ไปสนใจการใช้ Layout แบบ RelativeLayout จากนั้นก็กลับมาคิดเรื่อง Notification ว่าควรลื่นไหลขณะ Runtime เหมือนที่เห็นใน FB Message
ก็พบว่าการวาง Layout ใน Android ทำได้ 2 แบบ คือ Declare UI elements in XML และ Instantiate layout elements at runtime เมื่อไปค้นดูก็ไปไม่ถึงไหน ได้แค่การสั่งให้สร้าง Layout at Runtime ใหม่ขึ้นมา พร้อมสร้าง TextView และส่งค่าเข้า TextView ที่สร้างขึ้น
ความเดิมตอนที่แล้ว เคยเล่าเรื่องการใช้ Template : Basic Activity ใน ตอนที่ 8 แต่ข้ามเรื่อง Menu ของ Toolbar ใน AppBarLayout ที่มีความสัมพันธ์กับหลายแฟ้ม ครั้งนี้กลับมาสนใจ และเพิ่มไป 3 ตัวเลือก พร้อมกิจกรรมที่ได้ทดสอบมาแล้วข้างต้น ทั้งหมดยังอยู่ใน 1 Main Layout กับ 1 Main Activity เพราะ Android Studio วางโครงสร้างให้ Activity คู่กับ Layout ส่วน Content Layout ในตัวอย่างครั้งนี้ จะถูกเรียกผ่าน Main Layout
ใช้การ include เข้าไป ก็ต้องใช้ setVisibility(View.VISIBLE); ใน Activity กำหนดให้กับ include แต่ละตัว เพราะไม่มีวิธีส่งชื่อ Layout ให้ include โดยตรง
สรุปกระบวนการได้ 5 ขั้นตอน ประกอบด้วย 1) ทำความรู้จัก CoordinatorLayout ที่มีเสน่ห์ มาพร้อม Snackbar 2) การวางภาพคู่กับข้อความ 6 แบบ เลือกใช้ที่ชอบได้เลย 3) ใส่ Activity ให้กับ Menu ใน Toolbar บน AppBarLayout 4) การสร้าง layout at runtime เพื่อ say hello 5) สร้าง Layout สำหรับแสดง ImageView โดยเฉพาะ
</introduction>
กำลังเล่าเรื่อง การใช้โปรแกรม Android Studio สู่เพื่อนนักพัฒนา ผ่าน Blog
<process>
กระบวนการในการพัฒนา APP
เพื่อนำภาพและข้อความนำเสนอต่อกันเรียงลงมาเป็นแถว การจัดการเมนู การสร้าง Layout ช่วง Runtime และการนำภาพมาเรียงต่อกันตาม Vertical
มีขั้นตอน ดังนี้
1. ทำความรู้จัก CoordinatorLayout ที่มีเสน่ห์ มาพร้อม Snackbar
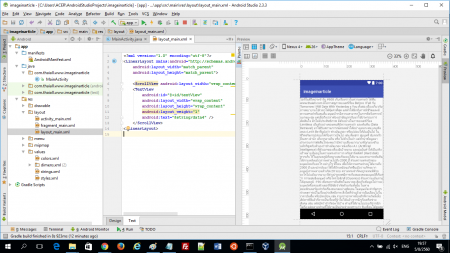
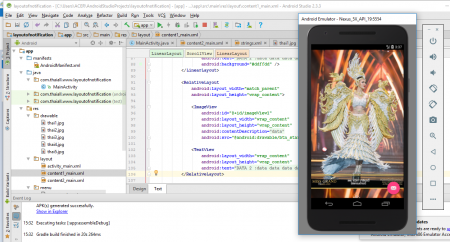
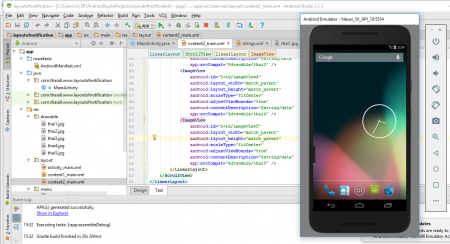
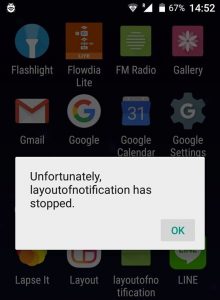
เริ่มต้นก็สร้าง project ใหม่ แล้วเลือก Basic Activity ตั้งชื่อ ว่า layoutofnotification
ยังมี Template อีกมาก ทาง Android แนะนำว่าสามารถ Add Code from a Template คือ เราไม่ต้องเขียน code จาก 0 เค้ามี Template มาให้เลือกตามชอบ เคยมีอยู่ 10 ตอนนี้มี 12 และอาจเพิ่มขึ้น เลือกแล้วก็จะมี file ที่จำเป็น และเรียกใช้งานได้ในระดับหนึ่ง เราเพียงแต่นำมาปรับเพิ่ม พบว่า หน้า activity_main.xml มี Hierarchy ของ Layout ดังนี้
1. CoordinatorLayout เป็น root layout
2. AppBarLayout และภายในมี ToolBar
3. ConstraintLayout ที่ถูก include แฟ้ม content_main.xml
4. FloatingActionButton ลอยอยู่ที่ตำแหน่ง bottom|end
สำหรับ CoordinatorLayout ที่ถูกเลือกใช้นี้
ทำให้เราได้เห็นการใช้ FloatingActionButton ร่วมกับ Snackbar และ AppBarLayout
https://gist.github.com/thaiall/7bfcfeb57ac459b0e664f19337438908
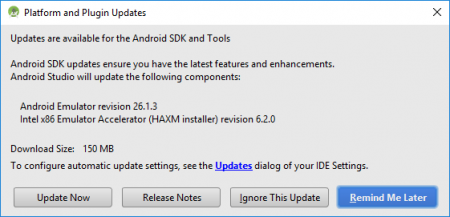
ใช้โปรแกรม Android Studio ไม่ทันไร ถาม Update อีก 150 MB
รอไร .. เครื่องผมเหลือเนื้อที่ตั้งเยอะ
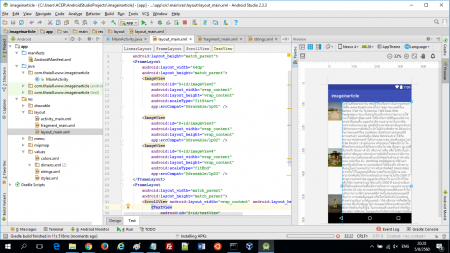
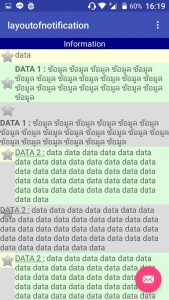
2. การวางภาพคู่กับข้อความ 6 แบบ เลือกใช้ที่ชอบได้เลย
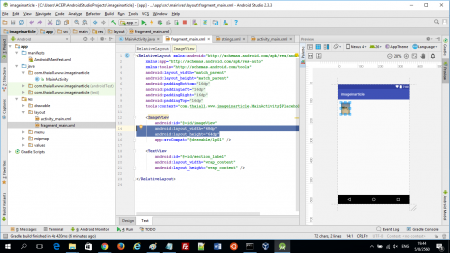
เดิม activity_main.xml จะ include แฟ้ม content_main.xml
แต่ผมลบไปแล้ว ของเดิมมี ConstraintLayout เป็น Root Layout
กับ TextView ที่เขียนว่า Hello World!
แต่ผมต้องการ LinearLayout ที่ทำ ScrollView ได้
จึงสร้าง content1_main.xml
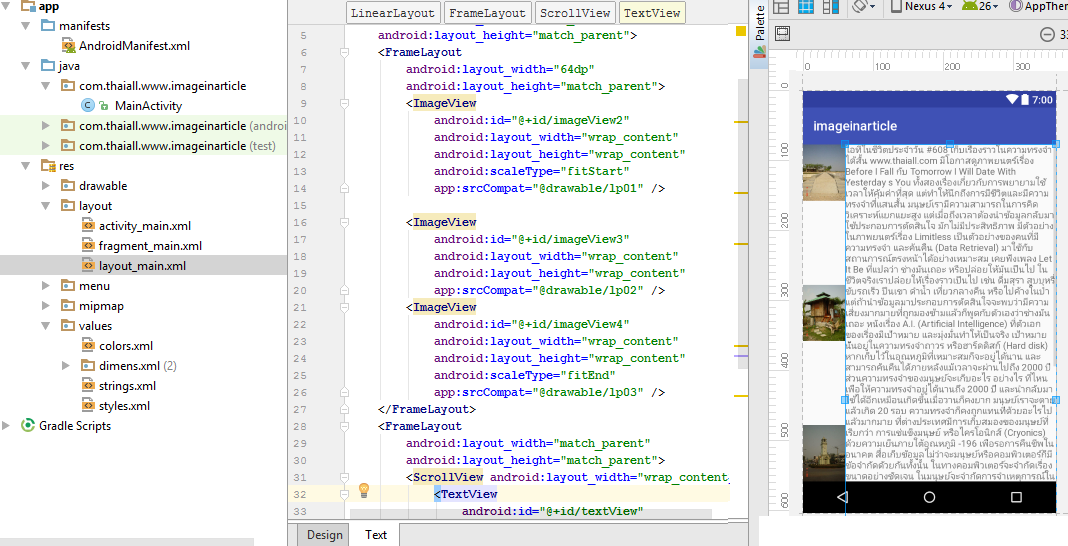
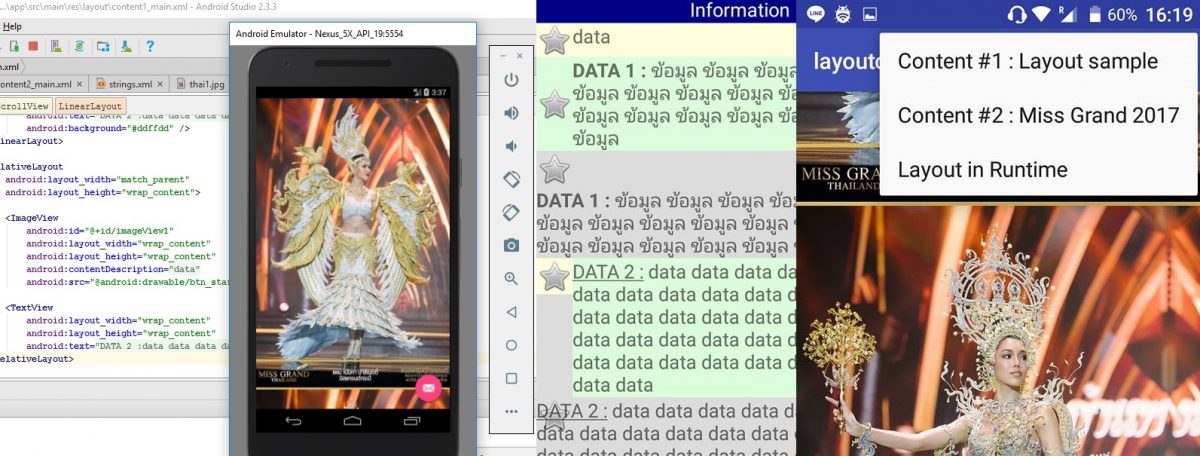
โดยมี Hierarchy ของ Layout สำหรับ 6 คู่ ดังนี้
 <LinearLayout orientation="vertical">
 <LinearLayout>
 <TextView text="@string/information">
 </LinearLayout>
 <ScrollView>
 <LinearLayout orientation="vertical">
 <LinearLayout orientation="vertical">
 <TextView drawableStart />
 <TextView drawableStart />
 <ImageView />
 <TextView />
 </LinearLayout>
 <LinearLayout orientation="horizontal">
 <ImageView />
 <TextView />
 </LinearLayout>
 <RelativeLayout>
 <ImageView />
 <TextView />
 </RelativeLayout>
 <RelativeLayout>
 <ImageView id="@+id/imageView2" />
 <TextView layout_toEndOf="@+id/imageView2" />
 </RelativeLayout>
 </LinearLayout>
 </ScrollView>
 </LinearLayout>
ถ้าดูผลลัพธ์จากกภาพ ดูโครงสร้าง และเห็น code น่าจะนำไปใช้ต่อได้
https://gist.github.com/thaiall/304e6ddd917dd0350aa57fba72955082
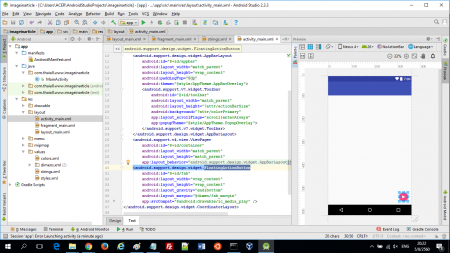
3. ใส่ Activity ให้กับ Menu ใน Toolbar บน AppBarLayout
มีขั้นตอนดังนี้
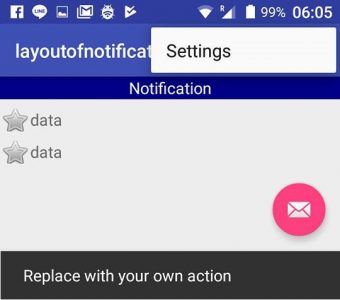
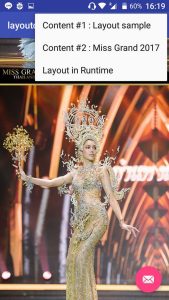
3.1 วางแผนไว้ในใจ ว่าคลิ๊ก 3 จุดที่มุมบนขวา แล้วมีเมนูไหลลงมา
อยากเห็นอะไร ก็ให้เปิด app, res, menu, menu_main.xml
จากนั้นก็เพิ่มตัวเลือกตาม item ที่ต้องการ แต่ title ต้องเปิดแฟ้ม strings.xml พิมพ์ไปพร้อมกัน
<item
 android:id="@+id/content1"
 android:orderInCategory="100"
 android:title="@string/content1"
 app:showAsAction="never" />
https://gist.github.com/thaiall/eb8137794add90145d19daa9d1c2c0d8
3.2 เปิด MainActivity.java ขึ้นมาแก้ไข
มองหา method ชื่อ onOptionsItemSelected(MenuItem item)
เดิมจะมี if (id == R.id.action_settings) ผมก็เปลี่ยนไปใช้ switch จะได้สะดวก
ตัวอย่างนี้ต้องปรับการใช้ include ใน activity_main.xml
switch (item.getItemId()) {
 case R.id.content1:
 findViewById(R.id.content1).setVisibility(View.VISIBLE);
 findViewById(R.id.content2).setVisibility(View.GONE);
 return true;
 case R.id.content2:
 findViewById(R.id.content1).setVisibility(View.GONE);
 findViewById(R.id.content2).setVisibility(View.VISIBLE);
 return true;
 case R.id.layoutRuntime:
 layoutRuntime();
 return true;
 default:
 return super.onOptionsItemSelected(item);
 }
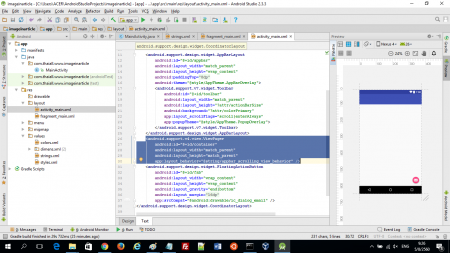
3.3 แก้ไขการ include เพราะสั่งไปว่าจะ visible หรือ gone
มองหา
 <include layout="@layout/content_main"
เปลี่ยนเป็น
 <include
 android:id="@+id/content1"
 layout="@layout/content1_main"
 android:visibility="visible" />
 <include
 android:id="@+id/content2"
 layout="@layout/content2_main"
 android:visibility="gone" />
https://gist.github.com/thaiall/e55bca08d5927c97dd2dec5367771085
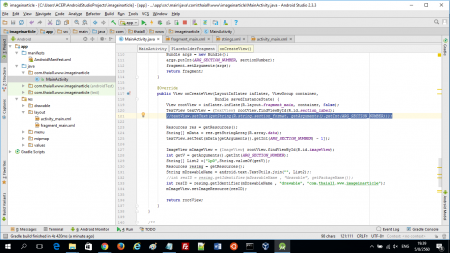
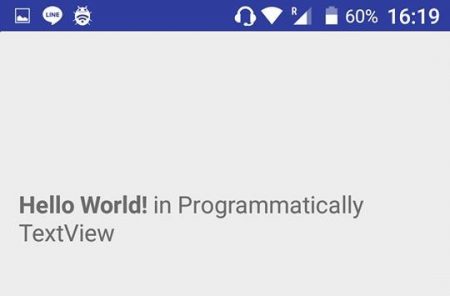
4. การสร้าง layout at runtime เพื่อ say hello
เนื่องจากที่ผ่าน 8 ตอนเป็นการใช้โปรแกรม Android Studio
ผ่าน Main_Activity.java เท่านั้น และ layout ก็ไม่ได้มีเพิ่มขึ้นเป็นพิเศษ
ไม่มีการควบคุม Layout ผ่าน Main java เลย
แต่ code สร้าง Layout at runtime สำหรับ
ท่านที่ต้องการ Layout แปลกใหม่ กว่าที่มีไว้ ก็สร้างช่วง Runtime ได้
ได้ตัวอย่างมาจาก
http://www.android-examples.com
private void layoutRuntime() {
 LinearLayout linearLayout = new LinearLayout(this);
 TextView ProgrammaticallyTextView = new TextView(this);
 ProgrammaticallyTextView.setText(R.string.helloworld);
 ProgrammaticallyTextView.setTextSize(16);
 ProgrammaticallyTextView.setPadding(30, 250, 30, 100);
 linearLayout.addView(ProgrammaticallyTextView);
 this.setContentView(linearLayout, new LinearLayout.LayoutParams(
 LayoutParams.MATCH_PARENT, LayoutParams.MATCH_PARENT));
 }
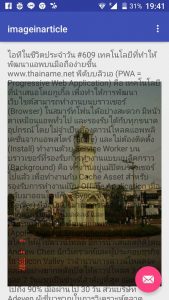
5. สร้าง Layout สำหรับแสดง ImageView โดยเฉพาะ
ใช้ภาพตัวอย่างจาก http://www.thaiall.com/actress/missgrand2017/
หากมีข่าวประกาศ หนังสือ รายงาน พรบ. หรือภาพสาวงาม จะนำมาเรียงต่อกัน
ให้เพื่อนชมผ่าน app บน Android ก็ส่งเข้าไปเลยครับ
ตอนผมทดสอบบน Smartphone มีปัญหาเรื่องจำนวนภาพเยอะ
ใช้ภาพเยอะ ๆ แล้ว error ส่งผ่าน Command line
เชื่อมผ่านเปิดแอพ WiFi ADB ซึ่งบนนั้นอาจมี Bug น่ะครับ
แต่แฟ้ม app-debug.apk นี้ส่งเข้า emulator ได้ผลปกติ
เรื่องสำคัญ คือ properties ของ ImageView เพื่อให้ลงจอภาพพอดี
โดยเฉพาะ scaleType กับ adjustViewBounds
<LinearLayout orientation="vertical">
 <ScrollView>
 <LinearLayout orientation="vertical">
 <ImageView
 android:id="@+id/imageView1"
 android:layout_width="match_parent"
 android:layout_height="match_parent"
 android:scaleType="fitCenter"
 android:adjustViewBounds="true"
 android:contentDescription="@string/data"
 app:srcCompat="@drawable/thai1" />
 </LinearLayout>
 </ScrollView>
 </LinearLayout>
https://gist.github.com/thaiall/41e86984b4cabe35392e29fc05107f60
</process>
<website_guide>
+ https://developer.android.com/training/basics/firstapp/
+ http://www.techotopia.com/..User_Interface_in_Java_Code
+ https://stackoverflow.com/..without-setcontentviewr-layout-main
+ https://stackoverflow.com/..button-click-in-android
+ https://stackoverflow.com/..when-button-is-pressed
+ https://stackoverflow.com/..layout-in-android (viewstub)
+ https://developer.android.com/../declaring-layout
+ https://www.androidhive.info/..design-snackbar-example/
+ http://www.android-examples.com/..programmatically-example/
+ https://stackoverflow.com/..layout-on-java-code (setVisibility(View.GONE); and <ViewFlipper>)
+ https://developer.android.com/training/appbar/actions.html
+ https://developer.android.com/guide/topics/ui/menus.html
</website_guide>
หมายเหตุ
ถ้าสนใจติดตามเนื้อหาในบล็อกนี้ สามารถ subscribe ด้วย email ที่อยู่ข้างขวา หรือ click here