Github app ติดตามเขา เขาติดตามเรา รู้ได้

Github.com เป็นระบบที่บริการเป็นสาธารณะ
เข้าไปดูผลงาน ของเพื่อน/ศิษย์นักพัฒนา
เข้าไปติดตามใคร ๆ ที่เขาเปิดเผย
หรือถูกใคร ๆ ติดตามเรา
เกาะติดเราจนจะเป็นแฟนเพจอยู่แล้ว
ชอบผลงานของใคร
เดี๋ยวนี้ clone กันง่าย ๆ
แก้ไขอะไรโดยใครในทีม เห็นหมด
หรือเลือก fork แยกรุ่นมาจากตัวหลัก
มีนักพัฒนาบางคนที่เป็นลูกศิษย์
เรียนรู้วิถีเดิมของอาจารย์
และเรียนรู้วิถีใหม่เพิ่มเติม ต่อยอด
แล้วออกไปสู้กับผู้ร้ายที่เก่งกาจกว่าอาจารย์
มีให้เห็นเยอะมากในหนังของเฉินหลง
หรือศิษย์เส้าหลิน ที่ไปล้างแค้นแทนวัด
เล่าซะยาว เดี๋ยวจะเลยเถิดไปเรื่อย ๆ
จนไปถึง  ever night ซีรี่จีนเรื่องลูกศิษย์
แต่ลูกศิษย์ดันพบรักกับศัตรูของอาจารย์
สุดท้ายอาจารย์ตาย ขึ้นไปเป็นพระจันทร์

แล้วศิษย์ก็มีความสุข แต่งงานเป็นทาสรักสืบไป
สรุปว่า
แอป github นี่ดีนะครับ
ไว้ติดตามนักพัฒนาว่า
ทำไปกี่ repository กันแล้ว
จะได้ไปติดตามผลงานกันใกล้ชิด

#เล่าสู่กันฟัง 63-056 เขียน markdown เป็น pptxเล่าสู่กันฟัง 63-056 เขียน markdown เป็น pptx

เคยอ่านบล็อก อ.สมเกียรติ ปุ๋ยสูงเนิน somkiat.cc เรื่อง “มาทำ slide และ live code ใน VS Code ดีกว่า” ท่านใช้ markdown ในมุมมองใหม่ได้อย่างน่าสนใจ

ซึ่งผมก็เห็นว่าเป็นภาษาหลักสำหรับการเล่าเรื่องใน github.com สำหรับใครที่ไม่ต้องการเพิ่มขั้นตอนด้วยการไปเขียนใน github.io ที่รองรับ html ก็จะเขียนด้วย markdown ในแฟ้ม README.md แล้วแสดงผลหน้าแรกของ repo

ภาษา markdown เขียนง่ายกว่า html มาก และน่าจะง่ายที่สุดสำหรับการสร้างข้อความหลายมิติ (hypertext) และใน blog ของท่านพูดถึงการเขียนใน vs code แล้วส่งออกเป็น slide บน powerpoint หรือ pdf

Marp

ช่วงนี้ (มี.ค.63) มี covid-19 ระบาดหนัก เริ่มเปลี่ยนการศึกษาจาก #ระบบใส่ใจ คือ สอนกันแบบถึงเนื้อถึงตัว มาเป็น #ระบบใส่แมส คือ มี social distancing ใส่เครื่องป้องกัน สอนออนไลน์ สอนแล้วมาเรียนในยามที่สะดวก เรียนได้หลายครั้ง และเรียนได้มาก แบบ mooc ถ้าคุณครูเปิดให้เรียนซ้ำ ๆ ก็จะพัฒนาไปได้ไกล และกว้าง แบบ mass media

เมื่อวางแผนการสอน แล้วก็จะเริ่มสอน การสอนแบบเห็นหน้าครูเป็นชั่วโมง นั่งพูด ยืนพูด แบบ TED คงใช้ไม่ได้กับทุกวิชา

ดังนั้น powerpoint กับ camtasia จึงเป็นตัวเลือกที่น่าสนใจ ในการจัดทำสื่อการสอน การเปิดให้ส่งงาน ผ่านกลุ่มเฟส และทำข้อสอบผ่าน google form ก็พูดถึงกันมาก

กลับมาที่ markdown พบว่าเป็นภาษาที่เขียนง่าย นำหัวข้อมาเรียงแยกบรรทัดใน word หรือ notepad แล้วใช้ marp แปลงเป็น pdf, png, pptx หรือ html ก็ได้ slide สำหรับเตรียมพูดหลายชั่วโมงแบบมี navigation นำทาง

ผมลองใช้ marp-cli บน command line พิมพ์คำสั่งบรรทัดเดียว ก็แปลงแฟ้ม README.md เป็น myslide.pptx พร้อมสอนได้ทันที แก้ไขก็เพียงย้อนกลับมาแก้ข้อความใน README.md หรือไปแก้ที่ myslide.pptx ก็สะดวก แล้วยังจัดการ tempate ผ่าน gaia.scss ได้ตามชอบ คนที่พัฒนา marp เค้าว่าเป็น license : mit น่าติดตาม และนำไปใช้

ปล. เมื่อคืนนอนดึกหน่อย เกือบเช้า
เพราะติดพัน กับลูกเล่น css คุม markdown
http://www.thaiall.com/markdown

#เล่าสู่กันฟัง 63-047 ใช้ vscode จัดการกับ github

การทำงานร่วมกันเป็นทีม ผ่านบริการ git บน github.com เริ่มจากเปิดโปรแกรม vscode มอง Activity Bar ด้านซ้าย (Menubar, View, Appearance, Show Activity Bar) มอง Source Control หรือ Explorer จะพบรายการแฟ้ม (Menubar, View, Open View…, Source Control = Ctrl-Shift-G) เพื่อดำเนินการต่าง ๆ ในลำดับต่อไป ที่มาของบทเรียนนี้ ถูกเตรียมขึ้น เพื่อตอบข้อซักถามของ ณัฐภัทร คำมูล (นน) ที่จะใช้ vscode เชื่อม github.com โดยบทเรียนแรกเน้นการสร้าง และ ลบแฟ้ม ส่วนบทเรียนที่สองเน้นการอัพโหลดภาพเข้า git ที่มี Contributors หลายคน

http://www.thaiall.com/web2/key.php?topic=vscode_github&dir=dnNjb2Rl&file=aW5kZXguaHRtbA==

อ่านเว็บเพจข้อมูลบุคลากรคณะบริหารธุรกิจและรัฐประศาสนศาสตร์ (4M)

620113_bpa
620113_bpa

อ่านข้อมูล “คณบดี/บุคลากร” ของคณะบริหารธุรกิจและรัฐประศาสนศาสตร์ ม.เนชั่น แล้วสนใจในหลายเรื่อง มีความตั้งใจที่จะเก็บข้อมูลนี้ใน 3 รูปแบบ คือ 1) full screen image, 2) responsive screen image และ 3) file.mht โดยใช้ extension ของ chrome ชื่อ Full Page Screen Capture แล้วแชร์ให้นักศึกษาวิชาสื่อฯ (MIT) ได้เห็นตัวอย่างการจัดเก็บใน github.com และ github.io เพราะเคยพานักศึกษา CS เข้าใช้ github.com สำหรับเผยแพร่ ผลงานโฮมเพจน.ศ. ซึ่งหน้าเว็บบุคลากรใช้ CMS ที่จัดทำด้วย Joomla ขนาดของภาพที่ส่งเข้าไป ต้องใช้ css กำหนด width ให้เท่ากันคือ 188 px และฟอนต์ใช้ kanit เป็น free font ของ google ซึ่งการเรียกใช้ และ bootstrap เกี่ยวกับ web2 และ html5 ส่วนการเห็นคุณค่าของบุคลากร ตามหลักบริหาร 4M คือ Man, Money, Materials และ Management ก็สนใจเรื่องคุณภาพของบุคลากรเป็นสิ่งสำคัญที่สุด ทำให้นึกถึงบทบาทของ มูลนิธิโยนก ที่ส่งเสริม สังคมรักการอ่าน และทำโครงการครูภาษาอังกฤษเพื่อโรงเรียนไทย (TTC) พัฒนาภาษาอังกฤษของนักเรียนไทย โดยจัดหาบัณฑิตที่มีคุณภาพและมีจิตอาสาเข้าร่วมโครงการ

สร้าง Github page ชื่อ mycsharp เป็นต้น

ไม่ได้เขียน blog นานล่ะ
วันนี้ เล่าขั้นตอนว่าจะสมัคร Github pages อย่างไร
(ในเอกสารหนึ่ง ก็หยิบขั้นตอนมาเขียน blog ซะเลย)
เพราะหวังว่า
จะให้เด็ก ๆ มีกรุ (Repositories) ไว้เก็บของ
และมีโฮมเพจ (Homepage) ไว้ปล่อยของที่เก็บไว้
แต่เริ่มต้นจากการสมัครใช้บริการก่อน
แล้วค่อยสร้างเพจเปล่า ๆ ง่าย ๆ ขึ้นสักเพจหนึ่ง
ผ่านการเขียน code html ในแบบที่ github กำหนด
ขั้นต่อไปก็ค่อยให้เด็ก ๆ หาของมาหย่อนตามกรุของตน

ก็เป็นอีกเวที ที่เด็ก ๆ กลุ่มหนึ่งควรรู้จัก
และเข้ามาใช้งาน ใช้การกัน
ที่สำคัญ ใช้ฟรี และมีมืออาชีพเข้ามาปล่อยของฟรี เยอะมาก

ชวนสร้าง Github pages

สร้าง Github page ชื่อ mycsharp เป็นต้น
1. เข้า Github.com
2. สร้าง Repositories คือ กรุ หรือ ที่รับ เช่น mycsharp
3. เมื่อเข้าใน Repositories แล้ว
4. ให้สร้างเพจ ตามกรุที่สร้างขึ้น
เช่น https://thaiall.github.io/programming-page/
เชื่อมกับ https://github.com/thaiall/programming-page
จะพบแฟ้ม index.md เพื่อแนะนำตัวเอง และ repositories
5. วิธีสร้าง page ใน github.io
1. เข้า Settings ของ Repositories (ไม่ใช่ของ Account)
README.md ใน https://github.com/thaiall/vscode
index.md ใน https://github.com/thaiall/programming-page
เป็นหน้าแรก แต่คนละบทบาท กรณีนี้เป้าหมาย คือ index.md
2. หลังเข้า Setting
– Scroll down ลงมาหา GitHub Pages
– choose theme = time machine
– select theme
– Commit changes
หากเข้า Settings ของ Repositories อีกครั้งจะพบ link
https://thaiall.github.io/blank_repository/
3. หากต้องการแก้ไขให้เลือก edit index.md
มองหา Top Right มี Drop down list ให้เลือก
– Your Repositories
จาก Repository ชื่อ blank_repository หรือ mycsharp
คลิ๊กปากกา ที่มุมบนขวา ก็จะแก้ไขแฟ้ม index.md ได้
4. เนื้อหาใน index.md
– ชื่อ สกุล
– สาขาวิชา สถาบัน
– ประเด็นที่สนใจ
– ประสบการณ์
– งานอดิเรก หรือ ความสามารถพิเศษ
– แนะนำเพื่อน คนรู้จัก หนังสือที่ชอบ หรือแหล่งเรียนรู้
5. หากมีแฟ้มอะไรที่ต้องการแชร์เข้า Repositories
– Create new file หรือ Upload files
– ส่งลิงค์ เช่น https://thaiall.github.io/programming-page/

page settings
page settings

อยากแก้ไข source code ของเราในเครื่องเราที่อยู่ใน Github.com เริ่มจาก pull แล้วค่อย push

ทบทวนกันนิดนึง  .. ก่อนไป clone vscode ของ microsoft
ปัจจุบันมีบัญชีใน Github.com แล้วอยากแก้ไข code ทั้งของเรา และของเขา บนเครื่องคอมพิวเตอร์ของเรา ถ้าเป็นของเราก็ push กลับไปได้ เริ่มจาก pull มาในเครื่องเรา พอแก้ไข code เสร็จ ก็ push กลับเข้าไป

clone vscode
clone vscode

มีขั้นตอนดังนี้

1. ติดตั้ง git หา Download
ได้ที่ https://git-scm.com/download

2. เข้า cmd หรือไม่ก็ใช้ Atom editor เป็นอีกทางเลือกนึง
สร้างห้องเตรียมรับ repository ที่จะดึงมาแก้ไข
อาทิ d:\git\mygitfriends
แล้ว cd d:\git\mygitfriends

3. พบห้อง DOS> หลัง run cmd
เคยเล่าขั้นตอน 9 ข้อใน http://www.thaiall.com/blog/burin/8875/
หรืออ่านเพิ่มเติมที่ https://git-scm.com/book/en/v2/Git-Basics-Working-with-Remotes
วันนี้สั้นหน่อย แบบรวบรัด
DOS> git init
DOS> git config –global user.email “test@test.com”
DOS> git config –global user.name “test”
DOS> git remote -v เพื่อดูว่าเชื่อมต่อทิ้งไว้แล้วหรือไม่ จะได้ไม่ซ้ำ เช่น burin
DOS> git remote remove burin แค่นี้ก็ล้างข้อมูลที่เคยเชื่อมต่อไว้ แต่ folder ไม่หายนะครับ
DOS> git remote add mytest https://github.com/thaiall/mygitfriends.git
DOS> git pull mytest master ก็ดึง branch:master ตามลิงค์ข้างต้นมาในเครื่อง ต่อไปก็เรียก mytest
ข้อมูลมาเยอะเลย ไม่ถาม user & password เพราะเป็น public และมีรูปนึกศึกษาเพียบเลย
DOS> notepad README.md
แล้วเพิ่ม This is my test on 16 september 2017. ต่อท้ายไปอีก 1 บรรทัด
เอาละ Mission complete แล้วนะ ต่อจากนี้ก็ push ล่ะ
DOS> git add README.md
เพื่อให้ git รู้ว่ามีรายการเปลี่ยนแปลง คือ “แฟ้มนี้นะ ที่ส่งเข้าประกวด”
DOS> git commit -m “i want to write lesson at http://www.thaiall.com/blog
DOS> git push -u mytest master
ผมเลิกใช้คำว่า origin จะได้ไม่สับสน เพราะเราใช้อะไรก็ได้ ไม่ต้อง origin
จากนี้ก็จะลบข้อมูลการทดสอบทิ้งหละครับ เพราะ Mission complete
เนื่องจาก login github.com ไว้แล้ว เมื่อ push ก็ไม่ถาม user & password อีก

4. ถ้าต้องการ project ใน github.com ไม่ต้อง pull ก็ได้
ใช้ clone เพื่อ download ลงมาเลย แบบนี้แก้แล้ว push กลับไม่ได้นะครับ
เริ่มต้นก็ลบทุกอย่างใน current directory ก่อน clone อะไรมาได้ ก็จะได้รู้

4.1 แบบ pull
เริ่มจากกำหนดชื่อ branch อาทิ mytest ในเครื่องเรา ที่จะเชื่อมกับ branch master
แบบนี้คล้ายกับ clone แต่หวังจะ push ถึงได้ใช้ pull
DOS> git init
DOS> git remote add mytest https://github.com/thaiall/mygitfriends.git
DOS> git pull mytest master
มาเลย

4.2 แบบ clone ไม่ต้องอะไร สั่ง git clone ตามด้วย url ก็มาเลย
ไม่ต้องสั่ง git init ก็ได้ download มาเลย แล้วสร้าง Folder แยกให้
DOS> git clone https://github.com/schacon/ticgit
DOS> git clone https://github.com/thaiall/mygitfriends
DOS> git clone https://github.com/toyoshim/SyobonAction
DOS> git clone https://github.com/Microsoft/vscode
ถ้ารอ download นาน แล้วอยากยกเลิก ก็กด Ctrl+C หรือ close window

บทเรียนที่ 2 : การใช้ Git ตามคำแนะนำของ Github.com บน Bash on Ubuntu on Windows


เริ่มต้นกันเลย กับการสมัครใช้บริการพื้นที่ฟรี สำหรับเก็บ code ของ Github.com แล้วพบว่าหน้าแรกของ code ตอนที่ยังไม่มีแฟ้มใดเลย เค้าแนะนำคำสั่งมา 6 บรรทัดว่าจะสร้าง README.md อย่างไร ก็ลองพิมพ์ตามนั้นดูสักหน่อย เพราะ Nimit Suwannagate แนะนำคำสั่ง git ไว้ใน กลุ่ม ไทย PHP ที่เป็นการทำ backup_master เข้ามาเกี่ยวข้อง  มีคำสั่งน่าสนใจหลายคำสั่ง แต่ถ้าเริ่มต้นต้องคำสั่งบน Github.com นี่หละ สำหรับผมใช้ระบบปฏิบัติการ Windows 10 และมี Bash on Ubuntu on Windows ก็ถือโอกาสใช้ git บน Linux ที่อยู่ใน Windows

ขั้นตอนการใช้ git ตามที่ github.com แนะนำ ดังนี้

1. สร้าง folder ชื่อ git ที่ drive d
และสร้าง folder ชื่อ mygitfriends ใน git
จะได้ folder d:/git/mygitfriends เตรียมพื้นที่ไว้ทำงาน และอ้างอิงง่าย ๆ หน่อย
ที่ตั้งชื่อว่า mygitfriends จะลองชวนเพื่อนที่สนใจ
มาเข้ากลุ่ม collaborators ของ repository จึงตั้ง folder เป็นชื่อนี้

2. เข้า bash on ubuntu on windows
แล้วติดตั้ง git เพื่อทำงานใน ubuntu on windows

$sudo apt-get install git

3. นั่งมองคำสั่งที่ github.com แนะนำแป๊ปนึง มีความหมายทุกบรรทัด

echo "# mygitfriends" >> README.md
git init
git add README.md
git commit -m "first commit"
git remote add origin git@github.com:thaiall/mygitfriends.git
git push -u origin master

4. ใน bash on ubuntu on windows
ทำตามขั้นตอนดังนี้
4.1 $cd /mnt/d/git/mygitfriends

4.2 $echo “# Hello world! v.1” >> README.md

4.3 $git init จะสร้าง folder .git แล้วแฟ้มอีกเพียบขึ้นมาให้

4.4 $git add README.md

4.5 $git commit -m “first commit” ได้รับแจ้งว่าต้อง config email กับ name ก่อนสั่งงาน ก็ต้องสั่ง 2 บรรทัดนี้ก่อน
– git config –global user.email “you@example.com”
– git config –global user.name “Your Name”
หลัง config ก็สั่งใหม่ ก็เรียบร้อยด้วยดี
[master (root-commit) 2ff254f] first commit
1 file changed, 1 insertion(+)
create mode 100644 README.md

4.6 $git remote add origin https://github.com/thaiall/mygitfriends.git
หลังจากสั่ง $git remote ทำให้แฟ้ม config เพิ่มมา 3 บรรทัด
[remote “origin”]
url = https://github.com/thaiall/mygitfriends.git
fetch = +refs/heads/*:refs/remotes/origin/*

4.7 $git push -u origin master
เค้าแนะนำว่าให้ git pull ก่อน แล้วค่อย pushing again
! [rejected] master -> master (fetch first)
error: failed to push some refs to ‘https://github.com/thaiall/mygitfriends.git’
hint: Updates were rejected because the remote contains work that you do
hint: not have locally. This is usually caused by another repository pushing
hint: to the same ref. You may want to first integrate the remote changes
hint: (e.g., ‘git pull …’) before pushing again.
hint: See the ‘Note about fast-forwards’ in ‘git push –help’ for details.

4.8 $git pull origin master
warning: no common commits
remote: Counting objects: 8, done.
remote: Compressing objects: 100% (7/7), done.
remote: Total 8 (delta 1), reused 0 (delta 0), pack-reused 0
Unpacking objects: 100% (8/8), done.
From https://github.com/thaiall/mygitfriends
* branch master -> FETCH_HEAD
* [new branch] master -> origin/master
Merge made by the ‘recursive’ strategy.
_config.yml | 1 +
collaborators.htm | 14 ++++++++++++++
index.md | 37 +++++++++++++++++++++++++++++++++++++
3 files changed, 52 insertions(+)
create mode 100644 _config.yml
create mode 100644 collaborators.htm
create mode 100644 index.md
จากนั้นก็เปิดแฟ้ม .git/MERGE_MSG มาให้แก้ไข ก็ไม่ได้แก้ไขครับกด Ctrl+X ออกไป

4.9 $git push -u origin master

Counting objects: 6, done.
Delta compression using up to 4 threads.
Compressing objects: 100% (3/3), done.
Writing objects: 100% (5/5), 503 bytes | 0 bytes/s, done.
Total 5 (delta 1), reused 0 (delta 0)
remote: Resolving deltas: 100% (1/1), completed with 1 local object.
To https://github.com/thaiall/mygitfriends.git
5f749af..353f84d master -> master

5. ตรวจสอบผลงานตามขั้นตอนข้างต้น
หลังจากสั่ง $git push .. พบแฟ้ม README.md เข้าไปอยู่ใน github.com
มีเพียงแฟ้มเดียวที่วันที่เปลี่ยนอย่างถูกต้อง แฟ้มที่เหลือยังอยู่กันตามปกติ

5.1 ถ้า pull ใหม่ เค้าบอกว่า up-to-date แล้ว
From https://github.com/thaiall/mygitfriends
* branch master -> FETCH_HEAD
Already up-to-date.

5.2 ถ้า push ใหม่ เค้าบอกว่า up-to-date แล้วเช่นกัน
Username for ‘https://github.com’: [yourusername]
Password for ‘https://[yourusername]@github.com’:
Everything up-to-date

5.3 สรุปว่า ถ้า push หรือ pull โดยไม่เปลี่ยนแปลงแฟ้มใน origin
ก็จะไม่ส่งผลถืง master ที่อยู่ใน github.com เช่นกัน เพราะ git จะตรวจสอบก่อน

ลอง Push project จาก ATOM เข้า Repository ใน Github.com ทับของเดิมเกลี้ยงเลย

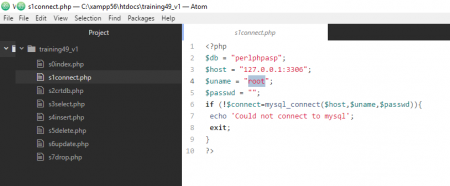
วันนี้วันดี .. ได้ลองใช้ ATOM editor มาครับ อยากลองว่า push ใน editor กับ script file หนึ่ง เข้าไปใน Github.com จะให้ผลเป็นอย่างไร ผล คือ เข้าแทนที่ Repository ทั้งหมด เพราะตั้งเป็น Master ไม่เป็น Branch ใหม่อย่างที่ควร การเข้าไปแทนที่แบบนี้ นึกถึงตอนทดสอบใช้ Firebase ส่งเข้าไปทั้งก้อนเลยเหมือนกัน
สรุปว่า
ได้ Clone แล้ว Download ออกมาเก็บไว้ก่อน
พอ unzip แล้ว push กลับเข้าไป ทุกอย่างก็ยังอยู่เหมือนเดิม
ยกเว้น วันที่ของแฟ้ม เปลี่ยนเป็นปัจจุบันหมดครับ


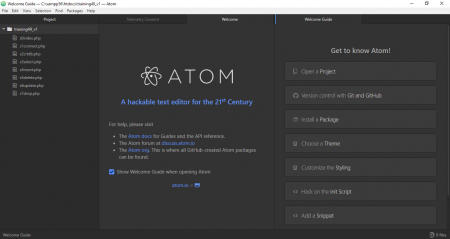
เล่าเรื่องการใช้โปรแกรม editor ที่ชื่อ ATOM
วันนี้ 3 กันยายน 2560 ได้รุ่น 1.19.5 มา
มีขั้นตอนที่จะเล่าสู่กันฟัง ดังนี้


1. ก่อน หรือหลังติดตั้ง ATOM editor
ก็ควรไปสมัครใช้บริการของ Github.com หากคิดจะใช้งานร่วมกัน
เพื่อจะได้เชื่อมระหว่าง ATOM editor กับ Github
เพราะใน ATOM ไม่ได้เชื่อมเข้า Github ในทันที
มีขั้นตอนอีกเยอะกว่าจะสั่งอะไรใน Github ได้

2. Install package ใน ATOM
เข้า Menu bar, Help, Welcome Guide, Install a Package, Open Installer
หรือ Menu bar, File, Settings, Install
หรือ Ctrl+Shift+P เพื่อ Search Package สำหรับ Install
พิมพ์ git ณ วันที่ 3 กันยายน 2560
package : git-plus 7.9.3 download 1737185 ของ akonwi
package : git-time-machine 1.5.9 download 265062 ของ Littlebee
package : git-control 0.9.0 download 157686 ของ Jacogr

3. เลือก install git-plus (ผมลงตัวเดียว)
หลังติดตั้งเสร็จก็เลือก Setting, Uninstall หรือ Disable ได้
เข้าไปดูใน Setting พบ Commands จำนวน 22 รายการ
คำสั่งไหนใช้บ่อยมี Hot-key ให้ใช้ด้วย
จะสั่งงานกด Ctrl+Shift+H

4. หลังติดตั้ง git-plus แล้วเรียก Git-Plus Palette
เลือกสั่ง add ก็ฟ้องขึ้นมาว่า
‘git’ is not recognized as an internal or external command,
operable program or batch file.
ก็มีเหตุที่ทำให้ใช้คำสั่งนี้ไม่ได้ ต้องทำข้อต่อ ๆ ไปก่อน
ปล.1 ไปสำรวจพบว่าใน Palette พบคำสั่งมากกว่า 22 รายการ ให้เลือกใช้
ปล.2 คำสั่ง add นี้คือการย้าย แฟ้มที่มีการแก้ไขเข้าไปอยู่ใน Staged changes
หากมีการ commit แล้ว push ก็จะรู้ว่าแฟ้มไหนเปลี่ยนแปลงบ้าง

5. Menu bar, View, Toggle GitHub Tab หรือ Ctrl+Shift+8
พบ This repository does not have any remotes hosted at GitHub.com
แสดงว่า ยังไม่ได้เชื่อม Repository หรือ Project เข้ากับ Github.com
เมื่อเข้าไปอ่านที่ https://atom.io/packages/git-plus
ในส่วนของ IMPORTANT พบคำแนะนำสำหรับผู้ใช้ SSH ว่าต้อง login อย่างไร
ส่วนผู้ใช้ Windows ก็เข้าไปอ่านใน [thread] ได้
พบว่า damianpirchio เค้าใช้งานได้หลังมีการ Update version ใหม่
บางปัญหา พอมี version ใหม่มา ปัญหาเหล่านั้นก็หายไป
https://github.com/akonwi/git-plus/issues/335
ปล. ปัญหานี้น่าจะเกิดจากการเชื่อมกับ repository ไม่เรียบร้อย
หากเชื่อมเรียบร้อย จะแสดงปุ่ม login เท่านั้น ตอนนี้ผมก็ยังไม่ได้ login ครับ
เวลา push ก็กรอก signin เป็นครั้งไป

6. Generating a new SSH key
บน Win10 มี Bash on Ubuntu on Windows

$ssh-keygen -t rsa -b 4096 -C "your_email@example.com"

Generating public/private rsa key pair = [github] ตามชอบ
Enter passpharase = [blank] ไม่ได้ใส่อะไร
file (/home/burin/.ssh/id_rsa) = [github] ตามชอบ
ดังนั้นใน C:\Users\ACER\AppData\Local\lxss\home\burin
จึงพบแฟ้ม github กับ github.pub

7. Adding your SSH key to the ssh-agent
ทดสอบว่า ssh-agent ทำงานอยู่ด้วย

$eval $(ssh-agent -s)

พบตัวเลข PID และคำสั่งนี้ทำบน Bash on Ubuntu on Windows

แล้วสั่ง $ssh-add ~/.ssh/id_rsa
แต่ผมสั่งว่า $ssh-add ~/github

พบ Identity added: /home/burin/github (/home/burin/github)
เพราะกำหนด file ว่า github บน Windows ตอนที่ Generate

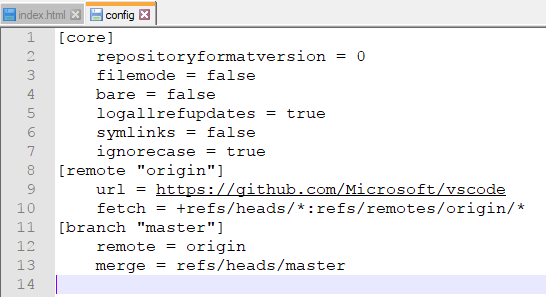
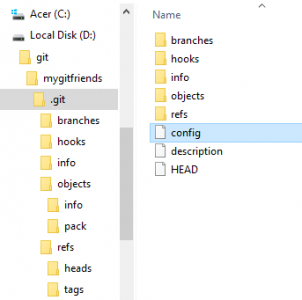
8. ไปแก้ config ใน git ของ Project
ตามคำแนะนำของ damianpirchio
https://github.com/akonwi/git-plus/issues/335
มีตัวอย่างที่ https://github.com/damianpirchio/inmobiliaria

เดิม
 [core]
 repositoryformatversion = 0
 filemode = false
 bare = false
 logallrefupdates = true
 symlinks = false
 ignorecase = true
เป็น
 [core]
 repositoryformatversion = 0
 filemode = false
 bare = false
 logallrefupdates = true
 symlinks = false
 ignorecase = true
 [remote "origin"]
 url = https://github.com/thaiall/programming-page.git
 fetch = +refs/heads/*:refs/remotes/origin/*
 [branch "master"]
 remote = origin
 merge = refs/heads/master

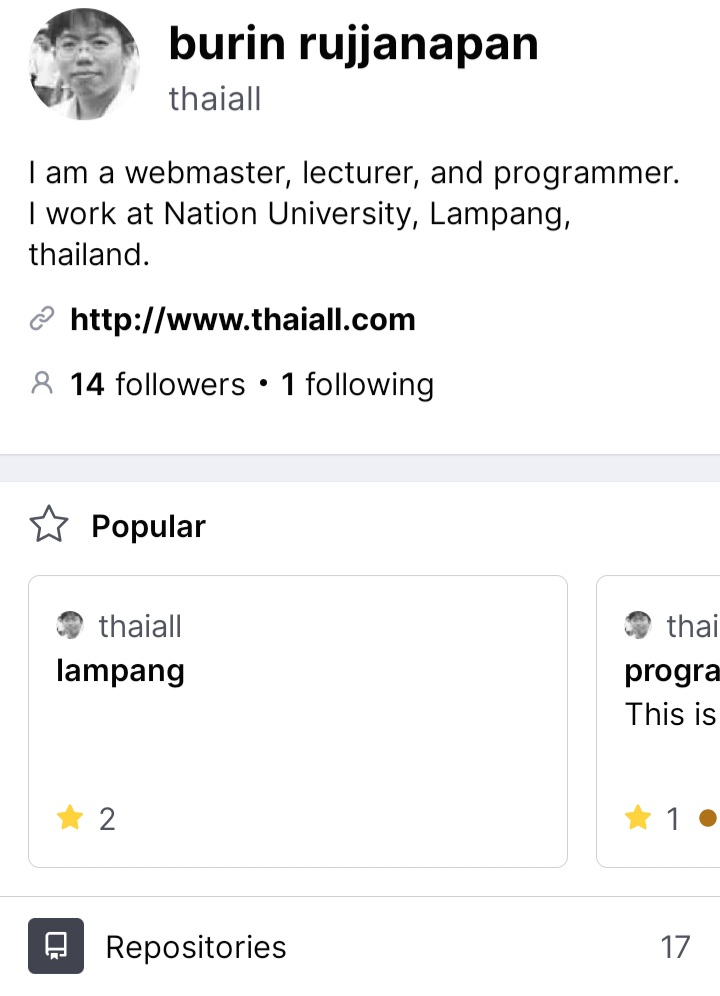
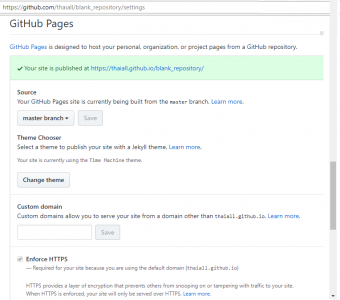
ที่ github ผมมี https://github.com/thaiall/programming-page ครับ

9. ตอนสั่ง add พบการใช้ git
อ่านจาก https://stackoverflow.com/.. /internal-or-external-command
ก็พบปัญหาเหมือนกัน คือ
‘git’ is not recognized as an internal or external command,
operable program or batch file.
มีขั้นตอนแก้ไขบน Windows 10 ดังนี้
9.1 หา Git ให้พบว่าอยู่ตรงไหน
ของผมอยู่ใน C:\Users\[ACER ชื่อเครื่อง]\AppData\Local\atom\app-1.19.5\resources\app\node_modules\dugite\git\cmd\
เพราะมากับ ATOM รุ่น 1.19.5 อัพเดทไปเมื่อวาน ตอนลงเป็น 1.18 ครับ
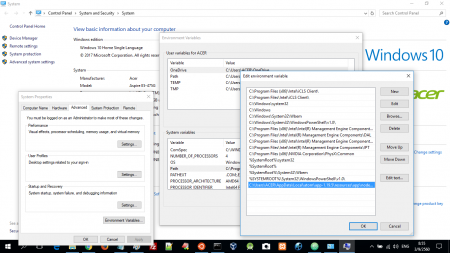
9.2 กดปุ่ม Window+Pause เพื่อเข้า System
แล้ว Advance system setting
แล้ว Environment Variables ใต้ Advanced Tab
9.3 ในหัวข้อ System variables มองหา Path แล้ว Edit
แล้ว New
แล้วกรอกไปว่า C:\Users\[ตามที่พบข้างบนยาว ๆ]\git\cmd\
9.4 ทดสอบด้วยการเข้า DOS แล้วพิมพ์ git
แล้วสั่งอะไรไม่ค่อยจะได้นะครับ ต้องไปทำงานใน ATOM

10. พบปัญหา หลังกด push รอบแรก จาก task bar
เพราะ push คือ การ upload project ส่วน pull คือ download project
ส่วน commit คือ การให้รายละเอียดก่อน push

พบ
 Note: No remote detected for branch master.
 Cannot push because there is no remote named "origin"
 for which to create a remote tracking branch
 หรือ
 fatal: Invalid refspec '+refs/heads/:refs/remotes/origin/'

พอเปลี่ยนใน config ของ git เป็นตาม code ด้านล่างนี้ ปัญหาก็หายไป

[remote "origin"]
 url = https://github.com/thaiall/programming-page.git
 fetch = +refs/heads/*:refs/remotes/origin/*


11. พบปัญหา หลังกด push รอบ 2

พบ
 error: src refspec master does not match any.
 error: failed to push some refs to 'https://github.com/thaiall/programming-page.git'

วิธีแก้ไข
กดปุ่ม commit ก่อนกดปุ่ม push

12. กดปุ่ม commit พบปัญหาอีกแล้ว

พบ
 Run
 git config --global user.email "you@example.com"
 git config --global user.name "Your Name"
 to set your account's default identity.
 Omit --global to set the identity only in this repository.
 fatal: unable to auto-detect email address (got 'ACER@LAPTOP-xxxxx.(none)')

วิธีแก้ไข
ต้องเข้าไปเพิ่มใน config ของ git
[user]
name = [you@example.com]
email = [Your Name]

13. ไม่มีอะไรใน Staged Changes แต่น่าจะเคย add เข้าไปแล้ว
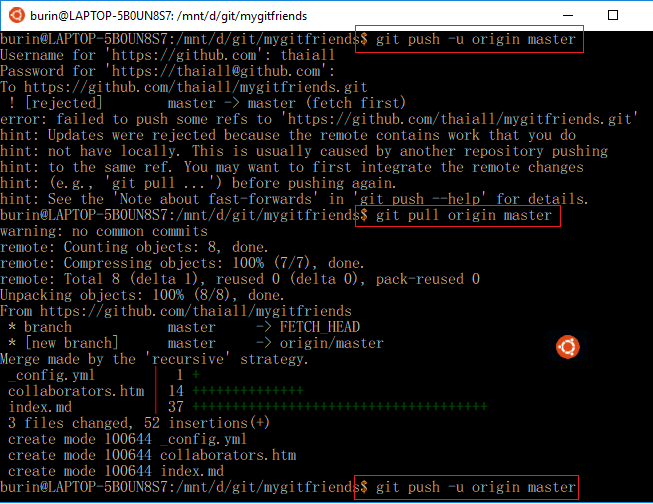
กด Push 2 รอบ
พบ Please enter your credentials for https://github.com
และ remote: Invalid username or password.
fatal: Authentication failed for ‘https://github.com/thaiall/programming-page.git/’
สงสัยจะใช่ username กับ password ผิดจริง ๆ ไม่มีอะไรมากครับ
ตกใจไว้ก่อน

14. ใส่รหัสถูกต้อง พบปัญหาอีกแล้ว
พบ
The tip of your current branch is behind its remote counterpart.
Try pulling before pushing again. Or, to force push, hold cmd or ctrl while clicking.
วิธีแก้ไข
เค้าว่า ถ้าผมไม่มีแฟ้มที่ github.com ให้กดปุ่ม ctrl ค้างไว้ขณะคลิ๊ปปุ่ม push
มีหน้าต่างถาม Force Push ขึ้นมาครับ กดเลย
แล้วก็ถาม signin อีกครั้ง ดีครับ ไม่ต้องจำรหัสค้างไว้
เค้าก็เตือนให้ pull ก่อนแล้วนะ แต่ผมไม่ได้ทำ

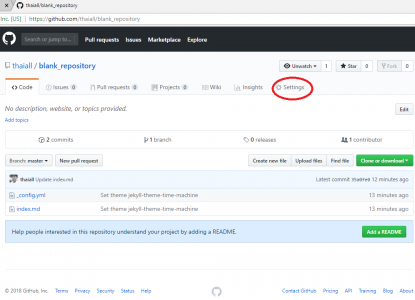
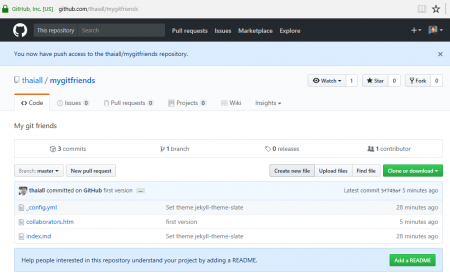
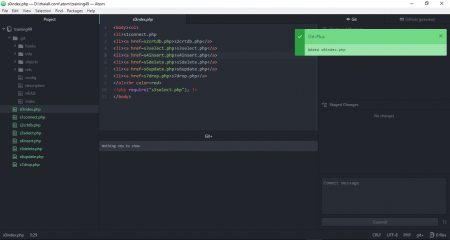
15. หลัง push สำเร็จ พบว่าใน repository บน github.com หายเกลี้ยง
เหลือแต่ s6update.php แฟ้มเดียว (โปรแกรมหนึ่งที่ทดสอบจะ push เข้าไป)
นึกขึ้นได้ว่า Download repository เป็น .zip ออกมาก่อนหน้านี้
unzip แล้วส่งกลับเข้าไปก็พบว่าทุกอย่างอยู่ครบ
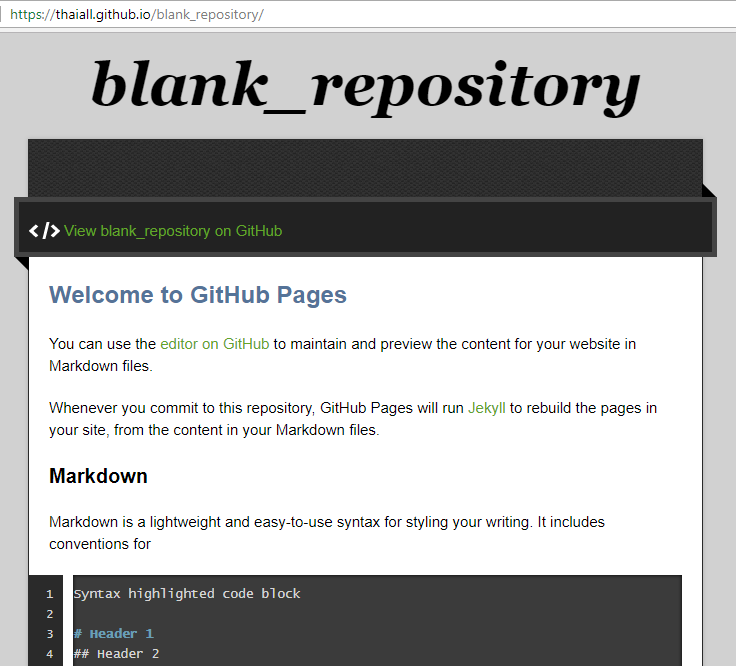
รวมทั้ง https://thaiall.github.io/programming-page/
ทุกอย่างกลับมาเหมือนเดิม
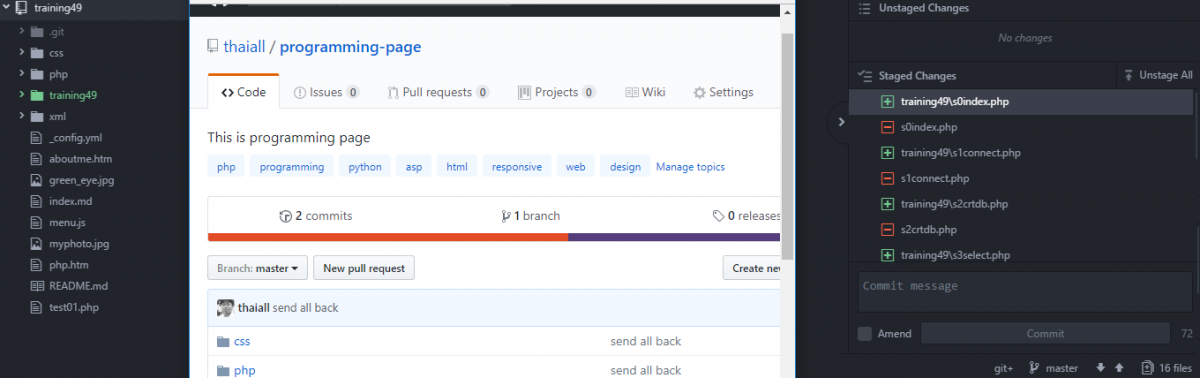
16. ขั้นตอนการ push
1. ตรวจสอบใน Staged changes ว่ามีอะไรเปลี่ยนแปลงไหม ค่อย Push
2. กรอกข้อมูลใน Commit แล้วกดปุ่ม Commit
3. กด Push 2 ครั้ง เค้าถามมาทีละครั้ง
4. ใส่ user and password แล้ว signin
5. ไปดูผลการ push ที่ repository ใน github.com

แนะนำเว็บไซต์
https://technologyand.me/2016/08/29/git-with-atom/
https://vwannabe.com/2016/05/26/how-to-use-github-and-atom/
http://www.thaiall.com/atom/

ใช้ word เขียนเว็บเพจก็ได้เหรอ

firebase storage
firebase storage

คำถาม เราใช้ MS Word เขียนเว็บเพจได้หรือไม่
คำตอบ ได้

วิธีการ
1. ใช้ MS Word เขียนสิ่งที่ต้องการ
2. save as แล้วเลือก type เป็น webpage หรือ webpage, filtered
จะได้แฟ้มที่มีนามสกุลเป็น .htm หรือ .html แล้วได้ folder
3. เปิดแฟ้ม .htm หรือ .html ด้วย browser ที่ชอบ
4. upload ไปเผยแพร่ใน web server


https://gist.github.com/thaiall/40e6a53637afd264e5f8b4a18c786125


บรรทัดที่น่าสนใจในแฟ้ม .html
บรรทัดที่ 12 จะอ้างอิงแฟ้ม filelist.xml ที่อยู่ใน folder ก็จะมี 3 แฟ้ม
คือ

<o:File HRef=”themedata.thmx”/>
<o:File HRef=”colorschememapping.xml”/>
<o:File HRef=”filelist.xml”/>

บรรทัด 32 เรียกแฟ้ม themedata.thmx
บรรทัด 33 เรียกแฟ้ม colorschememapping.xml
บรรทัด 437 body จะเรียกใช้ class
ชื่อ @page WordSection1 และ p.MsoNormal

https://gist.github.com/thaiall/40e6a53637afd264e5f8b4a18c786125#file-test20bold_webpagefiltered2010

ตัวอย่างแฟ้ม
1. แบบ webpage
https://www.facebook.com/groups/thaiebook/718574678293353/
2. แบบ webpage, filtered
https://www.facebook.com/groups/thaiebook/718574584960029/
3. แชร์ตัวอย่าง webpage ผ่าน firebase.com เก็บใน storage
https://firebasestorage.googleapis.com/v0/b/helloworld-38434.appspot.com/o/Test20Bold_webpage2010.htm?alt=media&token=be60861d-e957-47ea-bc1a-645db57c3026
ถ้าต้องการใช้ firebase แบบ hosting
1. ต้องสร้าง project
2. ดำเนินการจัดทำเว็บเพจ และแฟ้มที่เกี่ยวข้อง
3. มีวิธีการที่
http://www.thaiall.com/blog/burin/7733/
4. มีตัวอย่างที่
https://missgrand2016th.firebaseapp.com/